 basa Jawa
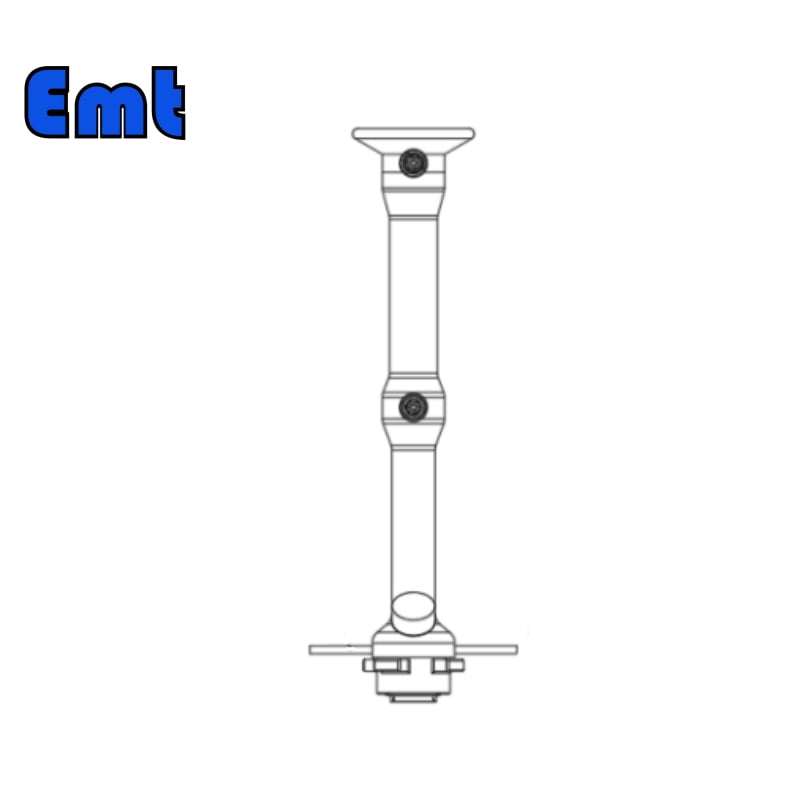
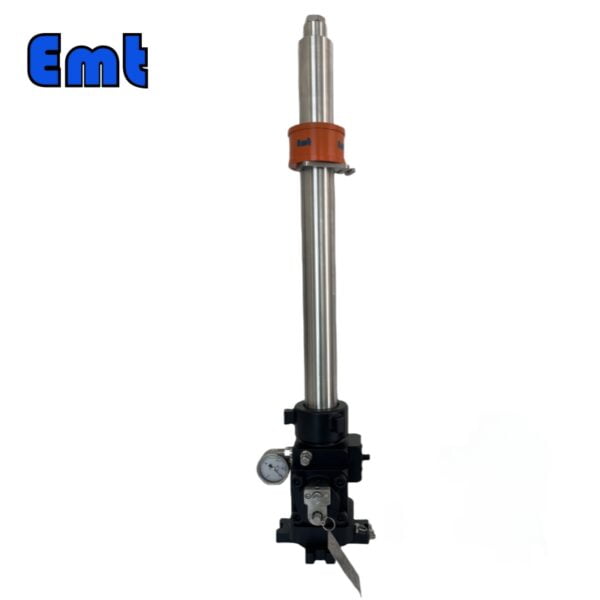
Description
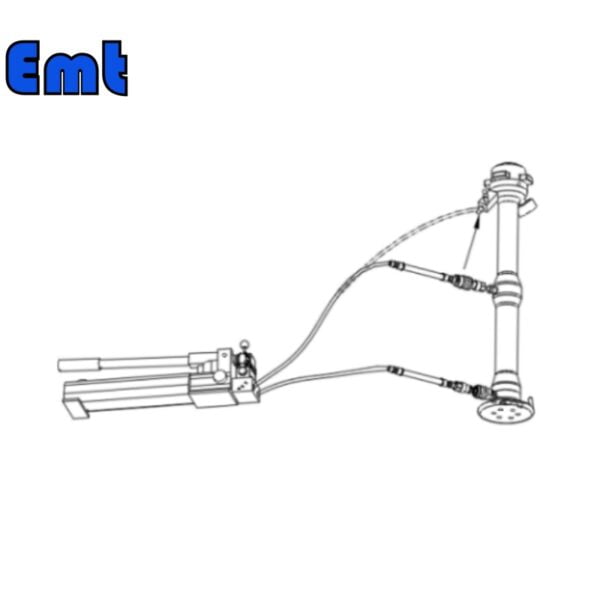
Using the Hydraulic Retriever Tool
There are a few things to be aware of when using the Hydraulic Retriever Tool:
Ⅰ Before using you should try to open and close the upper stem and pressure release valve to ensure their usability.
Ⅱ Before using you should try to open and close the oil return valve and direction valve.
Ⅲ High-pressure hydraulic hose should not be hard folded
Ⅳ In the process of hydraulic pump pressure notice whether there is oil leakage in the various joints of the high-pressure hydraulic hose
V The manual hydraulic pump equipped with this product is a specialized tool manufactured by a professional factory. It is recommended to use hydraulic oil grades 32-46, and for low temperature conditions, grades 22-32. To prevent injury to the operator, please note:
- Exceeding the maximum working pressure of the pump is not permitted.
- The system pressure should be returned to zero before refueling.
- Ensure that the oil tank is not overfilled. It is advised that the hydraulic oil level is maintained 8mm below the opening of the oil cap. Otherwise, refueling during operation can cause the oil tank to overflow and potentially lead to injury.
- The load must always be under the control of the operator.
- The pump should not be connected to the pump of another hydraulic system.
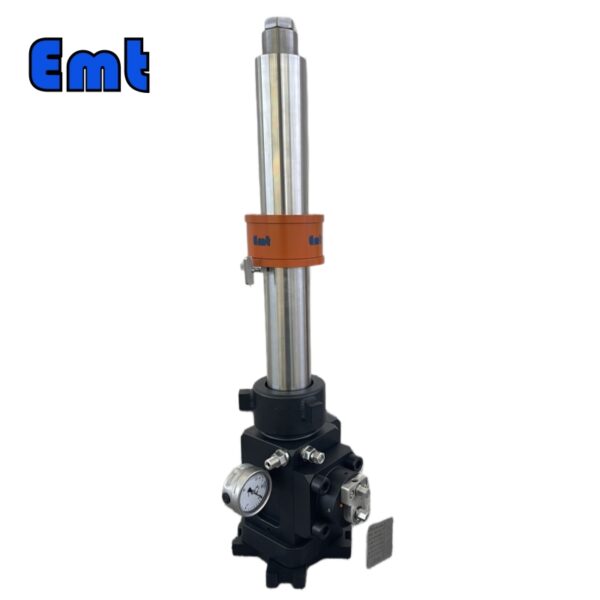
Double Bleek Block Using Instruction
A Double Block Valve is one of the core tools of the hydraulic retriever tool. It is an important pressure-containing member as well as an important pipeline system safety department.
Take and place operation precautions
Ⅰ Set up warning areas, safety signs, and non-operators before the start of the operation all leaving the warning range.
Ⅱ A portable gas detector (hydrogen sulfide or flammability) must be worn before the operation to monitor oil and gas leakage.
Ⅲ In the whole process of operation places with high sulfur gas must wear air breathing apparatus, one person to operate, one person to monitor.
Ⅳ If the ground in the operation area is wet, anti-slip measures should be set to ensure the safety of the operator.
Ⅴ The drainage hydraulic hose should be placed in the empty downwind. Check the surrounding environment before discharge, inform the rest of the personnel to stay away, slowly open the vent valve, slow pressure relief at a slow speed to prevent the hydraulic hose from bouncing and wounding people, and use a bucket to collect the liquid and gas discharged during discharge.
Ⅵ When operating, you must wear protective equipment and be supervised;
Ⅶ When removing the limit bolt, operate on the side of the limit bolt to prevent the limit bolt from ejecting and hurting people.
Ⅷ The operator observes the pipeline pressure at any time and timely adjusts the operating pressure of the hydraulic take-and-place tool.
Ⅸ Wear clean protective gloves when installing a new hanger.
Maintenance of the Hydraulic Retriever Tool
To make sure its trouble-free operation and to maintain its good working condition over the long term, correct and regular maintenance is very important.
Maintenance Introduction
Routine inspection before using
After storing a period, inspection is a must to ensure the retriever tool is in a runnable state. The described inspection time is supposed after the last use of the tool and has already been cleaned and maintained.
If the retriever tool is to be used over several days, this check should also be performed daily until the first retriever operation.
Hydraulic Retriever Tool
Check that all parts are present and that they are clean and intact. Check the internal seal as follows:
Connect the two hydraulic hoses of the pump to the take-and-place tool.
Set the pump to “INSTALL” and start pumping.
The connecting rod should extend smoothly and evenly.
Continue pumping until the connection rod is fully extended and the pressure gauge on the pump reads 100.
Hold the pressure for 1-2 minutes to see if it stabilizes and does not drop significantly.
Set the pump to “RETRIEVE” and pump until the connecting rod is fully retracted.
The connecting rod should retract smoothly and evenly.
Continue pumping until the pressure gauge on the pump reads 100 bar.
Hold the pressure for 1-2 minutes to see if it stabilizes and does not drop significantly.
If the pressure drops by more than 20-30 bar during any of the above steps, the internal seals must be inspected and replaced if necessary.
Check that the O-ring connecting the hammer nut (for sealing with the isolation valve) is present and not damaged.
Bleed Valve
Check that all components are present, especially the bolts that hold the valve body together.
Check that the exterior and interior of the isolation valve are clean and intact.
Check that the isolation valve can be opened and closed easily.
Check the surface of the valve ball for deep scratches or other damage. (Minor scratches usually don’t cause any problems).
Check that the O-ring at the bottom of the isolation valve (used to seal between the pipe joint body) is present and intact.
Scheduled Maintenance
There is no fixed maintenance time period. Using time and operation times, determine the period. The conditions of using the tool determine its scheduled maintenance.
If the retriever tool is used in a piping system that contains large amounts of sand or other debris, frequent maintenance procedures may be required to keep the retriever tool adequately clean during operation. In severe cases, such as when there is a large amount of sand in the piping system, it may be necessary to clean the retriever tools after each recovery operation. This is to avoid high wear and/or other damage to the inside of the hydraulic retriever tool.
Maintenance after use
After a series of take-and-place operations are completed, the hydraulic take-and-place tool is stored for some time and should be disassembled, cleaned, and inspected according to the following steps.
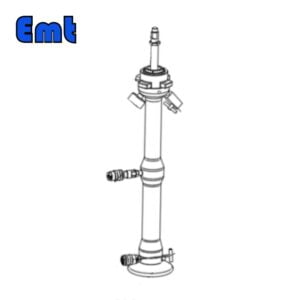
Double-acting hydraulic take-and-place tool
Disassembly and cleaning
Connect the hydraulic hose to the pump. Set the pump to “RETRIEVE” and pump until the inner cylinder (2) and connecting rod (3) are fully retracted into the tool
Loosen the six bolts on the master cylinder head (22) and remove the master cylinder head (6) and protective ring (7).
Place the retrieval tool on the oil receiver box and pump slowly (in “RETRIEVE” mode) until the seal at the back end of the inner cylinder comes out of the master cylinder (1). Place the stick on the other end of the main cylinder, then slowly and carefully push the inner cylinder out of the main cylinder. Please note that once the inner cylinder is loosened from the master cylinder, all the oil in the take-up tool will flow out, so make sure to keep the opening of the master cylinder above the oil receiving box. Also note that the inner cylinder is filled with hydraulic oil, which will flow out of the four holes in the cylinder.
Unscrew (13) from the end of the connecting rod and push the connecting rod out of the inner cylinder.
The Retriever tool is now fully removed for cleaning and inspection.

The following steps (6 and 7) are only performed if the hammer nut (11), pressure gauge (10), bleed valve (9), or cylinder head valve (8) is defective or has a leak associated with these components.
Loosen the screw M5x5 (11) on the loose coupling nut (5). Unscrew the hammer nut from the master cylinder (using a special Allen wrench), then remove the hammer nut (4).
Unscrew the pressure gauge (10) and the bleed valve (9) from the cylinder.
Unscrew the cylinder head stem (8). If any remaining components (quick couplings and handles) are damaged, these must also be removed, inspected and replaced as necessary.
Remove all O-rings, retainers and wear rings, but leave the anti-fouling ring on the inner cylinder in place. These rings are easily damaged when removed, so they should only be removed if they wear out and need to be replaced.
Thoroughly clean all components, especially the inside of the master cylinder, with a suitable cleaner,
O-rings and wear rings, and their grooves on the inner cylinder and connecting rod.
10. Carefully check the seals and wear rings. If any seals are scratched or show other signs of wear, they must be replaced. If you need to replace the antifouling ring on the inner cylinder, please refer to the “Replacing the antifouling ring” instructions in the next section.
11. Check the parts for damage, especially the inner surface of the main cylinder and the inner cylinder.
Absolutely ensure that all threaded surfaces are cleared of particles (sand, metal particles, etc.) and properly lubricated before fitting the individual components together. This is especially important when mounting the hammer nut to the master cylinder. Use a high quality anti-stick lubricant.
After all seals have been installed in the correct position, apply the seals with o-ring grease, especially before the connecting rod is installed into the inner cylinder, before the inner cylinder is installed into the master cylinder, and before the hammer nut is installed on the master cylinder.
Be careful when putting the parts back together. Special care should be taken to ensure that the seals are not damaged when assembling the components.
If the quick couplings (12, 14) are removed from the master cylinder for maintenance or replacement, make sure they are reinstalled in the correct location. The internal thread should be installed on the valve head of the take-and-place tool, and the external thread should be installed in the “middle” of the master cylinder of the take-and-place tool.
Important! If you want to replace the bolts that hold the tool, be sure to replace them with new original bolts from EMT. If other types of bolts are used, the double-acting hydraulic retrieves will no longer be guaranteed.

Reviews
There are no reviews yet.